PHPMailer is a standout amongst the most well-known open source PHP libraries to send messages. In this article, we will discuss why you should utilize PHPMailer rather than PHP’s mail() capacity and we’ll demonstrate to some code tests on generally accepted methods to utilize this library. Much of the time, it’s a contrasting option to PHP’s mail() work, however, there are numerous different situations where the mail() capacity is basically not sufficiently adaptable to accomplish what you require.
Most importantly, PHPMailer gives a protest arranged interface, while mail() is not question situated. PHP developers, for the most part, prefer not to make $headers strings while sending messages utilizing the mail() work since they require a great deal of getting away – PHPMailer makes this a breeze. Developers likewise need to write grimy code (getting away characters, encoding and designing) to send attachments and HTML-based messages when utilizing the mail() work though PHPMailer makes this easy.
Additionally, the mail() work requires a local mail server to convey messages. PHPMailer can utilize a non-local mail server (SMTP) in the event that you have authentication confirmation.
- Integrated SMTP protocol support and authentication over SSL or TLS encryption type.
- Can send an alternative plain text message of email for non-HTML email details.
- It can provide various kinds of error messages when it gets fails to connection or send an email.
You can get PHPMailer bundle from here.
You can utilize the mail server of an another host to send email, however for this, you initially need verification. For instance: to send an email from Gmail’s mail server you need a Gmail account in it. In the event that you are going to client Gmail’s mail server implies your need to turn on less security app in it.
SMTP is a convention utilized via mail customers to send an email to send a demand to a mail server. Once the mail server confirms the email it sends it to the goal mail server.
Here is a case of sending an email from Gmail’s mail server from your area. You needn’t bother with a local mail server to run the code. We will utilize the SMTP convention:
Step 1: Create a table to store the SMTP configuration details.
|
1 2 3 4 5 6 7 8 |
CREATE TABLE `smtp_details` ( `smtp_id` int(11) NOT NULL, `server_name` varchar(100) NOT NULL, `encrypt_type` varchar(10) NOT NULL, `port_no` int(5) NOT NULL, `username` varchar(150) NOT NULL, `password` varchar(150) NOT NULL ) ENGINE=InnoDB DEFAULT CHARSET=latin1; |
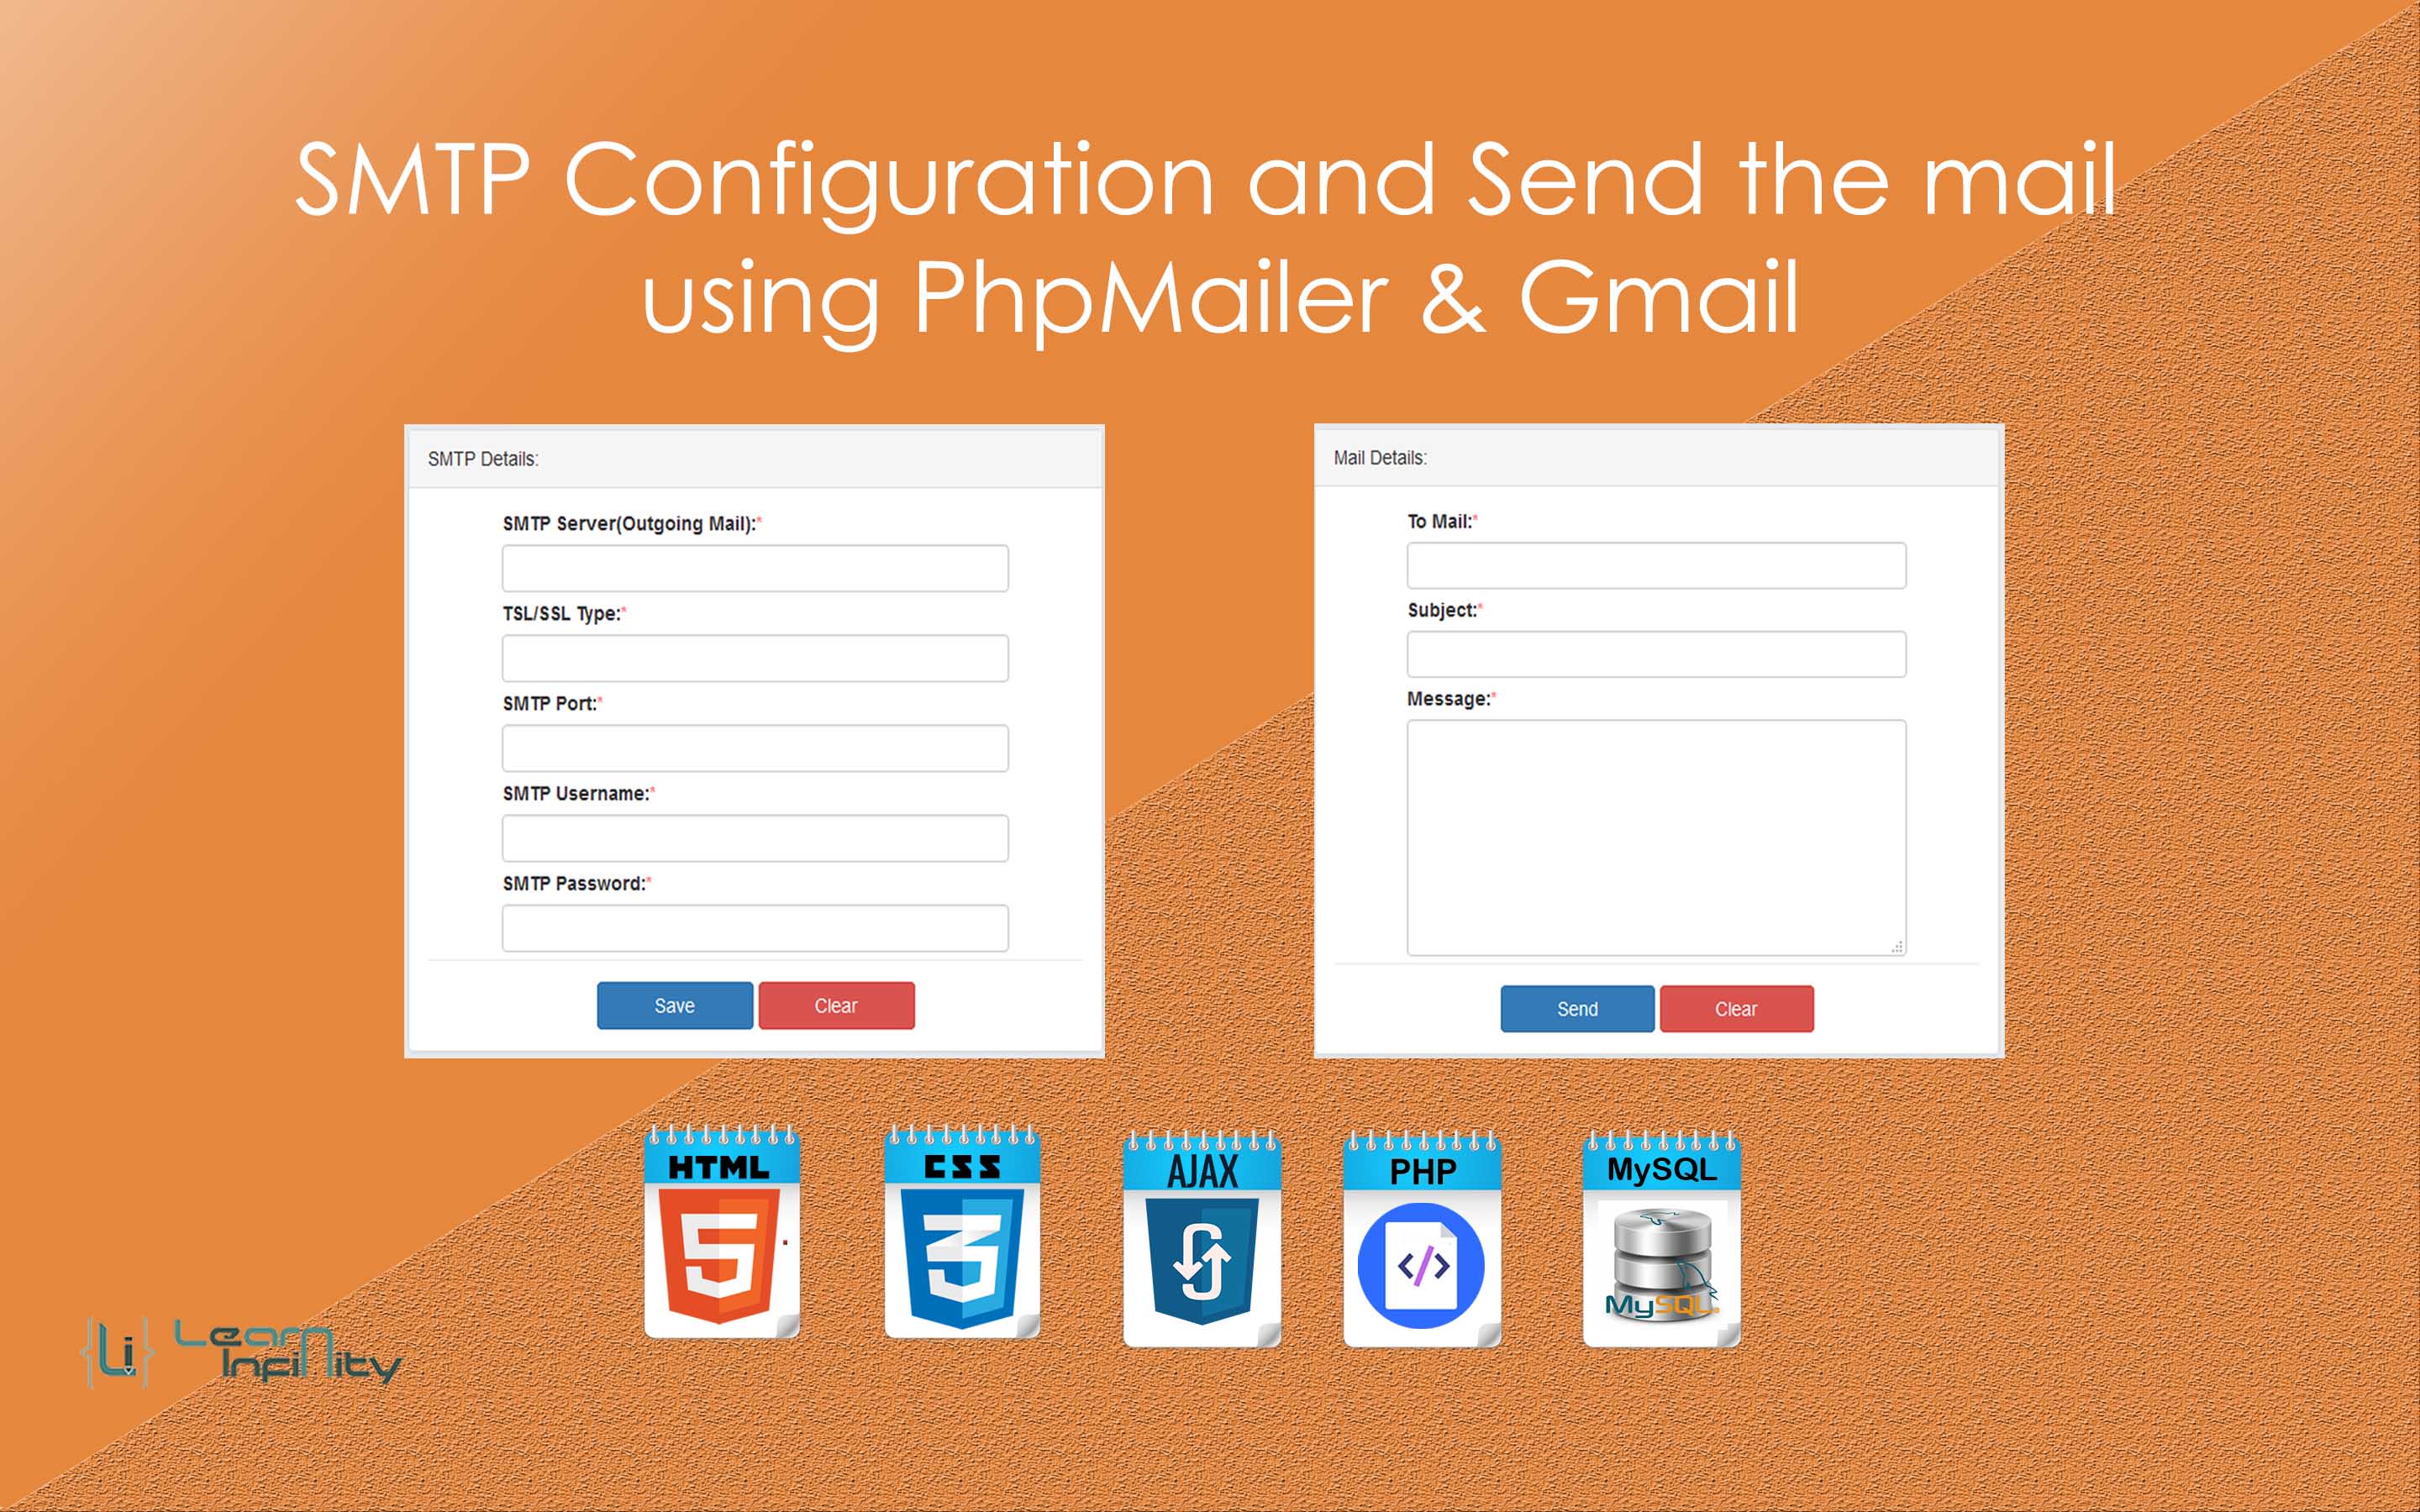
Step 2: Create a HTML form for get the SMTP details from front-end. This form contains server name, port no, encryption type and username and password of the SMTP connection.
|
1 2 3 4 5 6 7 8 9 10 11 12 13 14 15 16 17 18 19 20 21 22 23 24 25 26 27 28 29 30 31 32 33 34 35 36 37 38 39 40 41 42 43 44 45 46 47 |
<form id="LI_config_form" name="LI_config_form"> <input type="hidden" id="form_name" name="form_name" value="add_user" /> <div class="panel panel-default"> <div class="panel-heading">SMTP Details:</div> <div class="panel-body"> <div class="alert alert-success form-alter form-success" role="alert"> <i class="fa fa-fw fa-check-circle"></i> <strong> Success ! </strong> Data saved successfully. </div> <div class="alert alert-danger form-alter form-failed" role="alert"> <i class="fa fa-fw fa-times-circle"></i> <strong> Note !</strong> Data saving failed. </div> <div class="col-md-offset-1 col-md-10"> <div class="form-group"> <label for="server_name" class="required" >SMTP Server(Outgoing Mail):</label> <input type="text" class="form-control" id="server_name" name="server_name" required /> </div> <div class="form-group"> <label for="encrypt_type" class="required" >TSL/SSL Type:</label> <input type="text" class="form-control dup-check" id="encrypt_type" name="encrypt_type" required /> <span class="dup-chek-details"></span> </div> <div class="form-group"> <label for="port_no" class="required" >SMTP Port:</label> <input type="text" class="form-control" id="port_no" name="port_no" required /> </div> <div class="form-group"> <label for="username" class="required" >SMTP Username:</label> <input type="text" class="form-control" id="username" name="username" required /> </div> <div class="form-group"> <label for="password" class="required" >SMTP Password:</label> <input type="password" class="form-control" id="password" name="password" required /> </div> </div> <div class="clearfix"></div> <div class="form-action-group"> <button type="button" class="btn btn-primary btn-form-action btn-config-submit">Save</button> <button type="reset" class="btn btn-danger btn-form-action">Clear</button> </div> </div> </div> </form> |
Step 3: Write the jQuery Ajax function to send the SMTP configuration form details into PHP store procedure.
|
1 2 3 4 5 6 7 8 9 10 11 12 13 14 15 16 17 18 19 20 21 22 23 24 25 |
$(document).on('click', '.btn-config-submit', function(ev){ ev.preventDefault(); var btn_button = $(this); if($("#LI_config_form").valid() == true){ var data = $("#LI_config_form").serialize(); btn_button.html(' <i class="fa fa fa-spinner fa-spin"></i> Processing...'); btn_button.attr("disabled",true); $.post('save_details.php', data, function(data,status){ console.log("Data: " + data + "\nStatus: " + status); if( data == "1"){ //alert("Data: " + data + "\nStatus: " + status); $(".form-failed").hide(); $(".form-success").fadeIn(800); btn_button.html('<i class="fa fa fa-check-circle"></i> Done'); setTimeout(function(){ location.reload(); }, 2000); } else{ //alert("Data: " + data + "\nStatus: " + status); $(".form-success").hide(); $(".form-danger").fadeIn(800); btn_button.html('Submit').attr("disabled",false); } }); } }); |
Step 4: Write the PHP code to store the submitted values into MySQL database for future usage.
|
1 2 3 4 5 6 7 8 9 10 11 12 13 |
$server_name = mysql_real_escape_string(trim($_POST['server_name'])); $encrypt_type = mysql_real_escape_string(trim($_POST['encrypt_type'])); $port_no = mysql_real_escape_string(trim($_POST['port_no'])); $username = mysql_real_escape_string(trim($_POST['username'])); $password = mysql_real_escape_string(trim($_POST['password'])); $query = "insert into smtp_details(server_name,encrypt_type,port_no,username,password) values('$server_name','$encrypt_type','$port_no','$username','$password')"; $result = mysql_query($query) or die(mysql_error()); if($result) echo "1"; else echo "0"; |
Step 5: Design the mail function form in HTML form with to address, Subject and Message keys and also write the form submitting procedure using Ajax function.
|
1 2 3 4 5 6 7 8 9 10 11 12 13 14 15 16 17 18 19 20 21 22 23 24 25 26 27 28 29 30 31 32 33 34 35 36 |
<form id="LI_mail_form" name="LI_mail_form"> <input type="hidden" id="form_name" name="form_name" value="send_mail" /> <div class="panel-body"> <div class="alert alert-success form-alter mail-success" role="alert"> <i class="fa fa-fw fa-check-circle"></i> <strong> Success ! </strong> Mail sent successfully. </div> <div class="alert alert-danger form-alter mail-failed" role="alert"> <i class="fa fa-fw fa-times-circle"></i> <strong> Note !</strong> Mail sending failed. </div> <div class="col-md-offset-1 col-md-10"> <div class="form-group"> <label for="to_mail" class="required" >To Mail:</label> <input type="email" class="form-control" id="to_mail" name="to_mail" required /> </div> <div class="form-group"> <label for="subject" class="required" >Subject:</label> <input type="text" class="form-control" id="subject" name="subject" required /> </div> <div class="form-group"> <label for="message" class="required" >Message:</label> <textarea class="form-control" rows="7" id="message" name="message" required ></textarea> </div> </div> <div class="clearfix"></div> <div class="form-action-group"> <button type="button" class="btn btn-primary btn-form-action btn-mail-submit">Send</button> <button type="reset" class="btn btn-danger btn-form-action">Clear</button> </div> </form> |
And jQuery function to mail form details submit to server,
|
1 2 3 4 5 6 7 8 9 10 11 12 13 14 15 16 17 18 19 20 21 22 23 24 25 |
$(document).on('click', '.btn-mail-submit', function(ev){ ev.preventDefault(); var btn_button = $(this); if($("#LI_mail_form").valid() == true){ var data = $("#LI_mail_form").serialize(); btn_button.html(' <i class="fa fa fa-spinner fa-spin"></i> Processing...'); btn_button.attr("disabled",true); $.post('save_details.php', data, function(data,status){ console.log("Data: " + data + "\nStatus: " + status); if( data == "1"){ //alert("Data: " + data + "\nStatus: " + status); $(".mail-failed").hide(); $(".mail-success").fadeIn(800); btn_button.html('<i class="fa fa fa-check-circle"></i> Done'); setTimeout(function(){ location.reload(); }, 2000); } else{ //alert("Data: " + data + "\nStatus: " + status); $(".mail-success").hide(); $(".mail-danger").fadeIn(800); btn_button.html('Submit').attr("disabled",false); } }); } }); |
Step 6: Here the final step to connect the SMTP server using our stored configuration details.
- Include the PHPMailer class with our page,
|
1 |
require 'PHPMailerAutoload.php'; |
- Create a SMTP Object for including configuration details,
|
1 2 3 4 5 6 7 |
$mail_obj->isSMTP(); // Set mailer to use SMTP $mail_obj->Host = 'smtp_server_name'; // Specify main and backup SMTP servers $mail_obj->SMTPAuth = true; // Enable SMTP authentication $mail_obj->Username = 'smtp_username'; // SMTP username $mail_obj->Password = 'smtp_password'; // SMTP password $mail_obj->SMTPSecure = 'encrypt_type'; // Enable TLS encryption, `ssl` also accepted $mail_obj->Port = 'port_no'; // TCP port to connect to 25, 465, or 587 |
- Set sender name and mail id with SMTP object,
|
1 |
$mail_obj->setFrom('from_email_id', 'from_name'); |
- Set receiver name and mail id wtih SMTP object,
|
1 |
$mail_obj->addAddress('to_mail_id','to_name'); // Here Name is optional |
- If you want to add any attachments with mail use following line else avoid this,
|
1 2 3 4 5 |
$mail_obj->addAttachment('./filename.ext'); // Here Name is optional or $mail_obj->addAttachment('./filename.ext', 'display_filename.ext'); // Here Name is optional |
- Add mail subject, content and alternate details,
|
1 2 3 |
$mail_obj->Subject = 'mail_subject_here'; $mail_obj->Body = 'mail_content_here'; $mail_obj->AltBody = 'mail_alt_content_here'; |
- Finaly we ready to send the mail using send()
|
1 |
$mail_obj->send() |
|
1 2 3 4 5 6 7 8 9 10 11 12 13 14 15 16 17 18 19 20 21 22 23 24 25 26 27 28 29 30 31 32 33 34 35 36 37 38 39 40 41 42 |
$to_mail = mysql_real_escape_string(trim($_POST['to_mail'])); $subject = mysql_real_escape_string(trim($_POST['subject'])); $message = mysql_real_escape_string(trim($_POST['message'])); $smtp_result = mysql_query("select * from smtp_details limit 0,1") or die(mysql_error()); $smtp_row = mysql_fetch_array($smtp_result); $server_name = $smtp_row['server_name']; $encrypt_type = $smtp_row['encrypt_type']; $port_no = $smtp_row['port_no']; $username = $smtp_row['username']; $password = $smtp_row['password']; require 'PHPMailerAutoload.php'; $mail_obj = new PHPMailer; //$mail_obj->SMTPDebug = 2; // Enable verbose debug output $mail_obj->isSMTP(); // Set mailer to use SMTP $mail_obj->Host = $server_name; // Specify main and backup SMTP servers $mail_obj->SMTPAuth = true; // Enable SMTP authentication $mail_obj->Username = $username; // SMTP username $mail_obj->Password = $password; // SMTP password $mail_obj->SMTPSecure = $encrypt_type; // Enable TLS encryption, `ssl` also accepted $mail_obj->Port = $port_no; // TCP port to connect to $mail_obj->addAddress($to_mail); // Name is optional $mail_obj->addAttachment('./LI - Watermak.jpg'); // Add attachments $mail_obj->Subject = $subject; $mail_obj->Body = $message; $mail_obj->AltBody = ' - Learn Infinity'; if($mail_obj->send()) { echo '1'; } else { echo '0'; echo 'Mailer Error: ' . $mail_obj->ErrorInfo; } |


